Why You Keep an Idea Book: How I Finally Got My Window Arbor
If you’re into DIY and crafting you probably have one of these – an idea book.
I’m probably dating myself, but I have a three-ring binder full of pages I’ve torn from magazines over the years. I even have them organized by subject – crafts, garden, storage, etc. I still tear pages out of magazines when I’m at the beach – I’m too nervous to take my IPad into the sand.
Today, Pinterest serves this purpose for many of us. It has also given us access to many more ideas from so many talented people. But I still like to take a look back at my original book.
Every now and then I still like to take a look back at my original idea book. When I’m flipping pages, there are always a couple of ideas that I stop and dream about. Most of them I probably won’t ever get the opportunity to use.
But I finally did manage to use one of my favorites in my garden.
In 1998, I bought the house where Chris, my husband, and I now live – Chris wasn’t in the picture just yet, so it was just me. It’s a 1930s Sears & Roebuck Kit House. Yes, you could buy almost anything from the Sears catalog.
When I bought the house, the previous owners had totally redone the inside and added about 1,100 square feet. However, they had done nothing to the landscaping around the house.
It was a blank slate. And perfect for one of the ideas from my idea book that I had wanted to try for years!
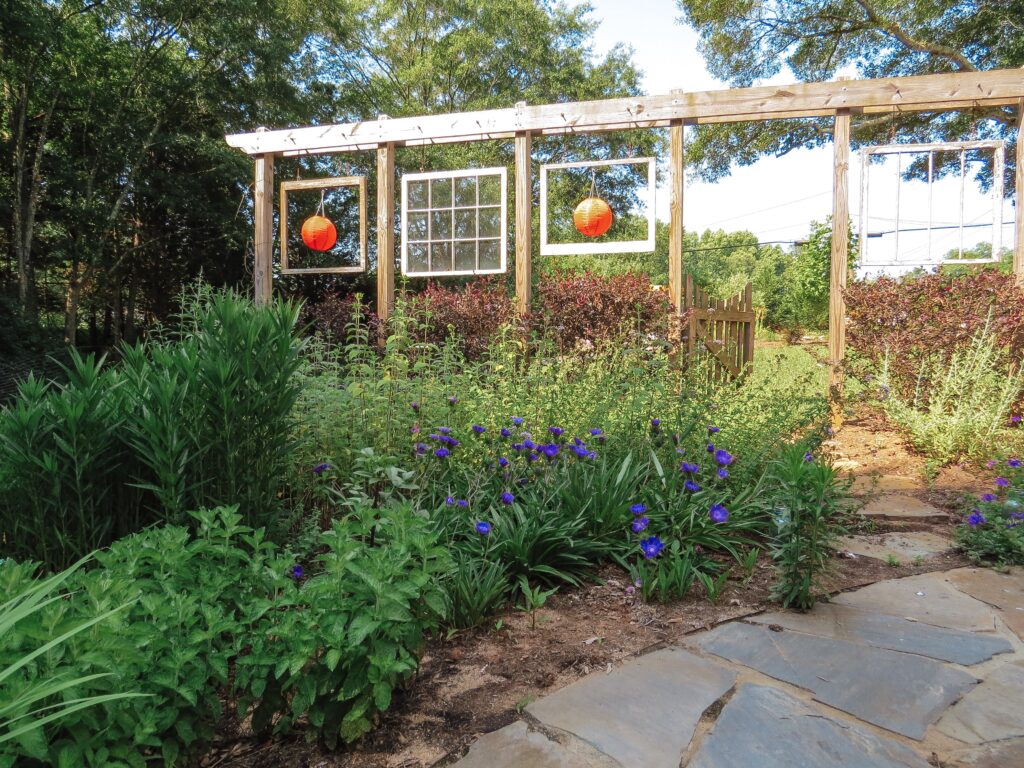
I don’t know what magazine its from so I can’t share it since I can’t get permission or give proper credit. So, just imagine four tall wooden posts along the outside wall of a house. There’s a top beam tying them all together. In between each of the post, hung from the top beam, are reclaimed wood windows – I called it a window arbor. Here’s a sketch that I did at the time trying to decide how many windows to use. How CUTE!
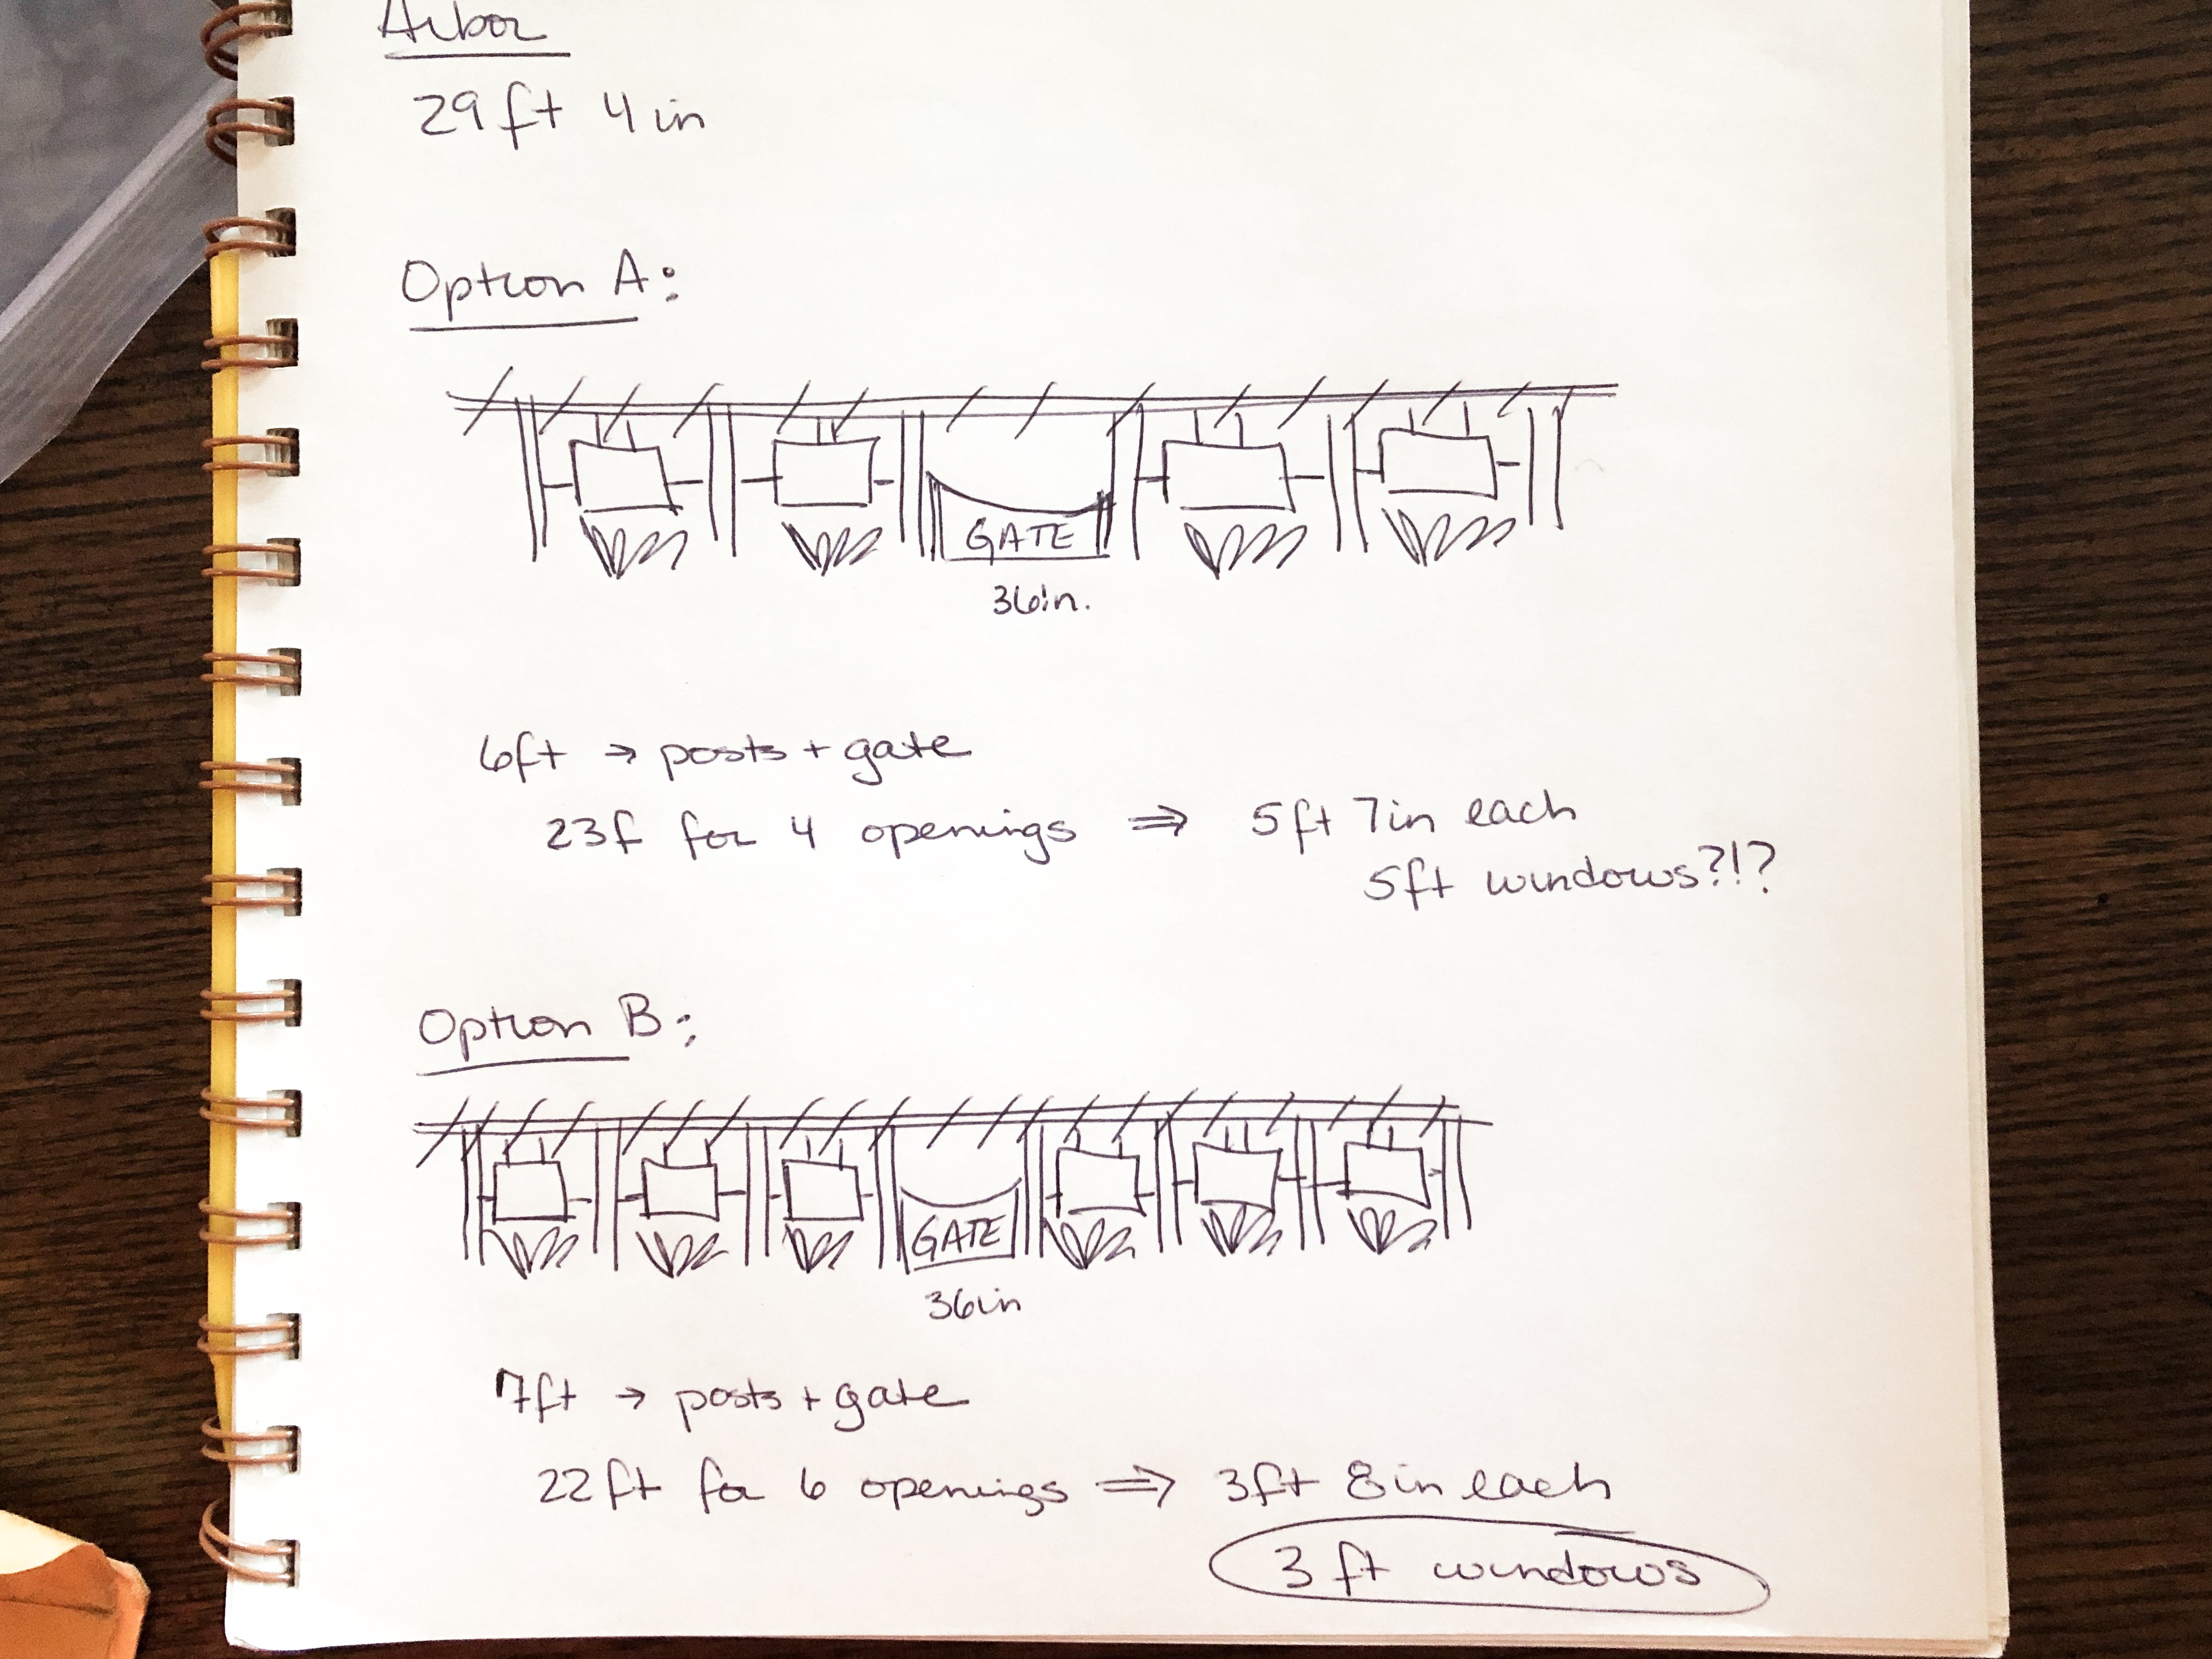
I had the perfect place for it in my vision for my new garden. I had a big side yard. I imagined the window arbor dividing the yard, kind of like a wall into my outdoor home. Here’s a sketch of my idea.
My goal was to make it feel like the windows were actual windows into my outdoor dining and living room. I planned to plant some type of evergreen shrub that would grow up to serve as walls.
I started by digging eight holes two feet deep. Mike, a friend, and I worked a two-person auger that I rented from the local tool rental place. It didn’t help that it was the middle of the summer and we were going through a drought. It was HARD work.
Once the holes were dug, we used quick drying cement to set the poles. While the cement was curing, we used a couple of different sized plates to cut decorative ends on the top beams and used lag bolts to attach them once the concrete had set.

We hung the windows using chain and a combination of eye and U-bolts that we picked up at the local hardware store. Mike does amazing things with wood. He made the gate from scraps of wood he had leftover from other projects (isn’t it pretty😊?)
The end result turned out better than I’d hoped.

It looks beautiful in all seasons.
I did end up taking the glass out of the windows after going through a couple of storms. The windows just blew around in the wind, breaking the glass and even ripping the bolts right out of the windows in some cases.
The windows hold up for years. I’ve replaced a couple over time, but these days they are readily available for a reasonable price.
Do you have an idea you’ve been holding onto for years? Please share it in the comments below so we can all get new ideas!